
5. Decorating a room
Start from any room: the one from tutorial 1 or a room of the apartment. This tutorial is about making it look like somewhere people live.
You will learn: the Textures panel, the material editor, the Paint tool’s shortcuts, dado rails and two-tone walls, curtains, arranging props, lights, procedural dirt and free decals.
You need: the GTA V install for the game’s textures and props.
1. A floor from the game’s textures
Section titled “1. A floor from the game’s textures”- Open the Textures tab in the bottom strip (Window > Game textures). It shows a curated list of the game’s textures. To search every texture name in the game, press Scan the game’s textures at the right of its toolbar once (about 6 minutes, in the background, cached).
- In the category list at the left of the toolbar (it reads All categories) choose wood, or type
parquetin the search box. Once the scan is done, a search of 3 letters or more covers every texture name in the game. - Click a card to see it larger beside the list, with its dictionary, category and size, how often it repeats per metre, and with its maps when the game has a normal or spec map of the same name (hover it to see them; keep it on).
- Drag the card onto the floor in the view. The texture becomes a material of the project and paints the floor.
tut5-01-textures-panel.webp2. Adjust the material
Section titled “2. Adjust the material”- Open the Assets tab of the bottom strip. It opens on the Materials folder: your new material is there.
- Click it. Properties shows the material editor in place of the selection (< Scene goes back): a large preview ball and the sections Surface, Specular, Opacity and Advanced.
- In Surface, set Repeats per metre: how many times the texture repeats along one metre (0.5 = one repeat every 2 m). Parquet usually looks right between 0.5 and 1.
- Try a Tint to warm the colour. The tint multiplies the texture’s colour; No tint takes it away again.
- In Specular, check that Normal and Spec under Normal and spec maps picked up the maps (Find maps by name looks again). A normal map gives the boards depth under lights.
At the end of Advanced (closed at first), Exports as says which game shader the material becomes and its render bucket
(default, normal_spec…).
tut5-02-material-editor.webp3. Two-tone walls with a dado rail
Section titled “3. Two-tone walls with a dado rail”- Select the room (V, click its floor) and open the Trims section of its Properties. Choose a Dado rail style; Dado height sets the height of the rail.
- Press B for the Paint tool. Choose White wallpaper (tint it) with the material button in the strip over the view, and Shift+click a wall above the rail: every wall face of the room is painted.
- Choose a darker material, then Shift+click a wall below the rail (or Shift+Alt+click anywhere on it): the band under the rail is painted on every wall of the room. Without Shift a click paints only the stretch of wall under the pointer.
- Add a Skirting and a Cornice from the same Trims section if the room has none yet.
tut5-03-paint-dado.webp4. Dress the window
Section titled “4. Dress the window”- Select the window (V, click it).
- Open Decorations (curtains and blinds) in its Properties and press + Curtains, + Roller blind or + Venetian. Curtains hang open at both sides until you tick Drawn across; their Tie list gives them tie-backs.
- Optionally open God rays and tick Light shafts through this window (a window in an outside wall).
tut5-04-curtains.webp5. Furniture, arranged
Section titled “5. Furniture, arranged”- Open the Game library tab of the bottom strip. Search with words in any order:
black chairfinds every model with both words in its name. Narrow it down by category (Seating, Tables, Decor…) and by size (Small, Medium, Large): in the bottom strip these are the two lists beside the search, in a taller Game library window a row of chips and buttons. - Click a card for its details beside the list; the star (Add a star in a taller window) keeps it in Favourites.
- Drag a table into the room. Drag chairs next to it: the snaps line them up with the table’s centre or edges, and a dashed guide shows what they align with.
- Select a chair and press Shift+D: a copy is picked up, ready to place with a click.
- Shift+click to select three or more chairs, then use Edit > Arrange > Distribute evenly across (or front to back) to space them evenly, or Edit > Arrange > Align to line them up. The same buttons are in the Arrange section of Properties.
tut5-05-library-filters.webpNeed a row of something, like ceiling spots or shelves? Select one and press Ctrl+Shift+D for an Array: a Count, then a Mode: Offset (each copy that far from the one before), Between (the last copy lands on a point you pick) or Along wall.
tut5-06-arrange-menu.webp6. Light it
Section titled “6. Light it”- Switch the view to Lit shading (the shading buttons at the right of the bar over the view, or View > Shading).
- Press L, choose Point, Spot or Capsule in the strip and click in the room: the light hangs 0.3 m under the ceiling. Ceiling lights snap to the room’s middle, halves and thirds.
- Select it. Its Properties set the Type, the Colour (the swatch opens a picker with hex and named colours such as Warm and Candle), the Intensity and the Falloff (how far it reaches).
- For a light on or close to a wall, set Wall culling (under Game settings) to Auto (nearest wall) so it does not light the next room through the wall. A ceiling light in the middle of the room keeps it Off, the default.
- Add a floor lamp prop from the Lights category of the Game library: props’ own lights export with them.
tut5-07-light-properties.webp7. Grime: procedural dirt
Section titled “7. Grime: procedural dirt”A brand-new room looks too clean. Dirt adds grime where real rooms get dirty.
- Select the room and open its Dirt section. Tick Own settings for this room (or select nothing and set the project’s default for every room in the Dirt section of the Interior tab).
- Tick Floor edge (scuffs above the skirting) and Corners (streaks in inside corners). Each kind has its own Strength and Reach; lower the Strength first, to about 0.3 to 0.5.
- Try Doors and frames: darker near the frame and a hand mark beside the latch.
- Breakup turns a smooth gradient into separate patches; Shuffle gives another random pattern.
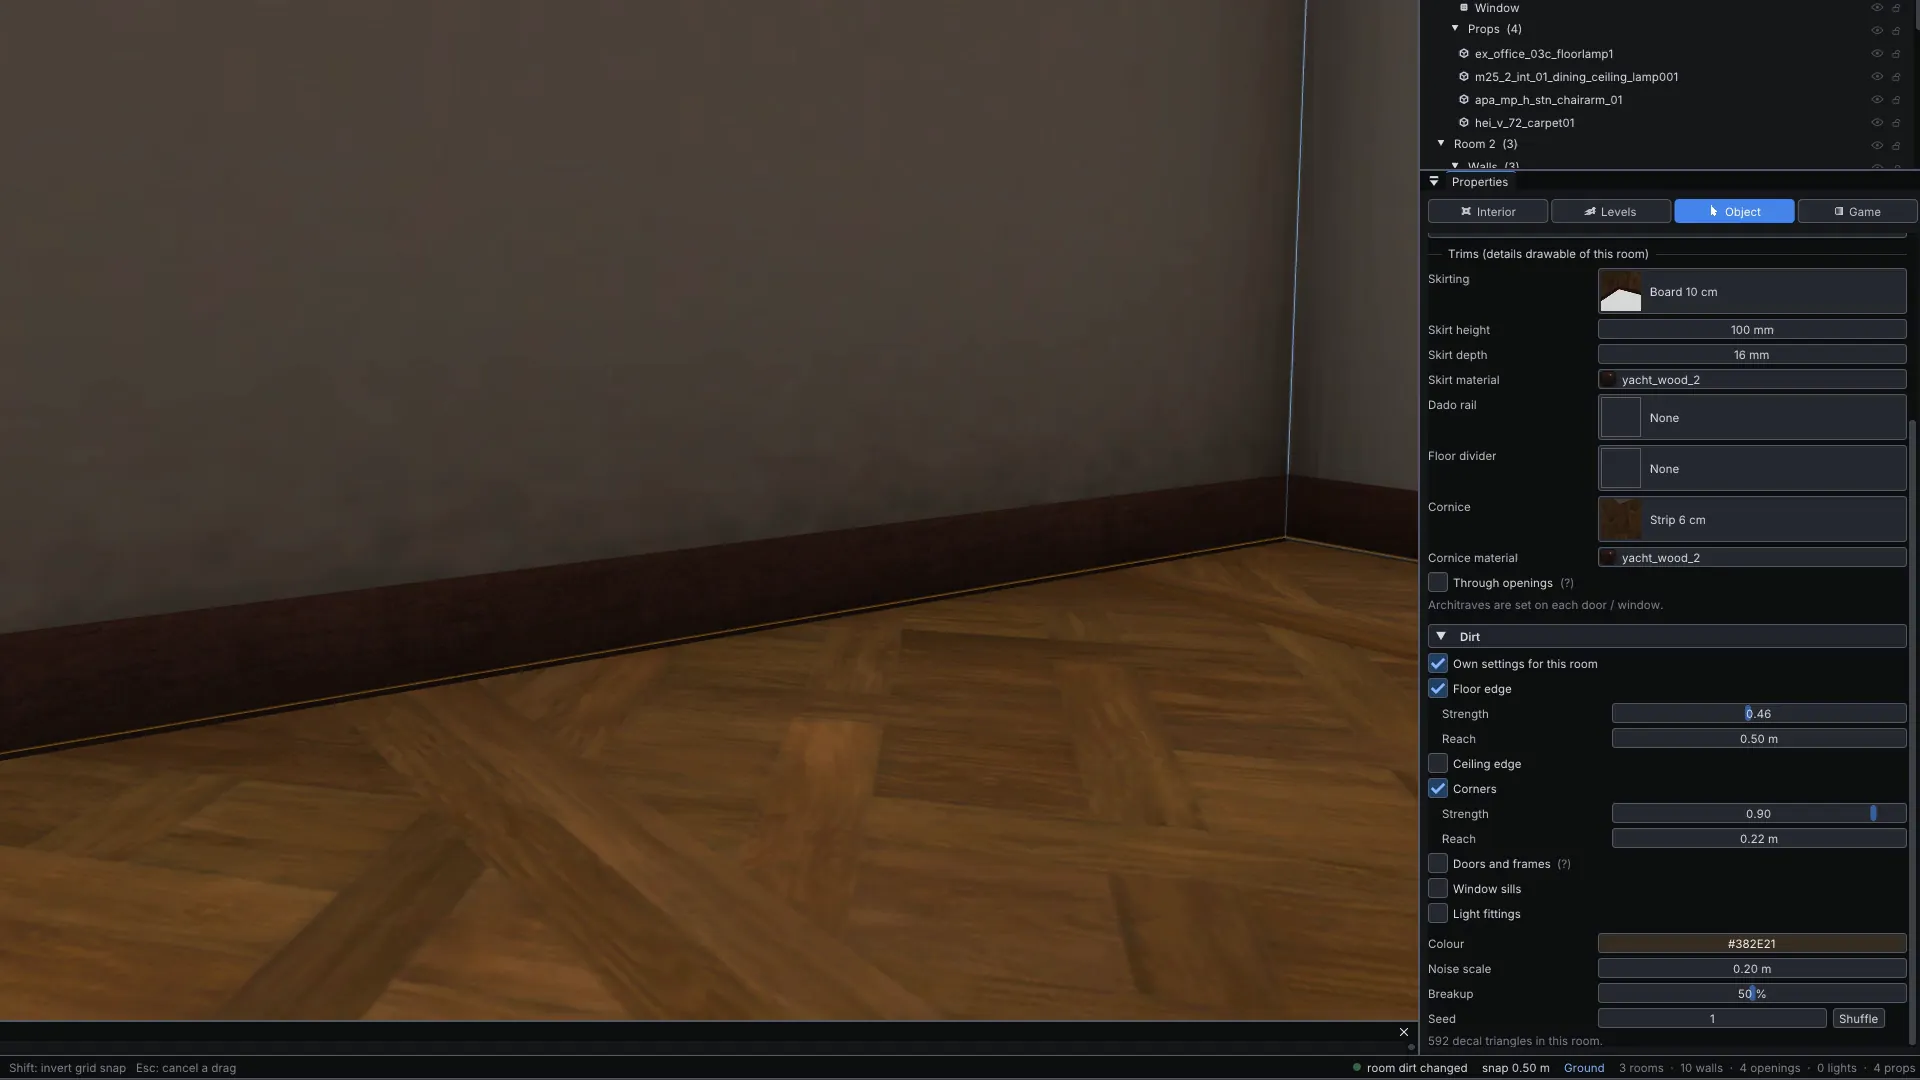
The dirt is live in the view and exports as geometry on the game’s decal shader: it never changes your textures.
8. Decals: stains and cracks
Section titled “8. Decals: stains and cracks”- Press Shift+B for the Decal tool.
- Click the picture button at the left of the strip over the view and choose a picture: Water stain, Crack, Scuffs, Soot / burn, Grime patch, Gradient, Mould, Drips or Footprints. The strip also sets the Width, Height, Turn, Opacity and colour.
- Hover a wall or ceiling: a ghost follows. R turns it 15 degrees, [ / ] make it smaller / larger.
- Click to place it. The next decal gets another random seed, so each stain is different.
- Turn on Wrap in the strip to bend a decal round a corner or into a doorway’s reveal.
Your own PNG, JPEG, TGA or DDS (with alpha) works too: Import image… in the same picture list.
tut5-08-decal-picker.webpNext steps
Section titled “Next steps”- 6. A walk-in interior: build inside a building of the map.
- Materials and textures and Dirt and decals in the user guide.