
1. Your first interior
In this tutorial you build a single furnished room and export it as a FiveM resource. It covers the handful of tools you will use in every project.
You will learn: the Room, Door, Window, Light, Prop and Select tools, painting a floor, the Problems list and Export.
Time: about 15 minutes. You need: Modlo Creator activated, and ideally your GTA V install set up (Installation and setup) so you can use the game’s props.
1. Start a project
Section titled “1. Start a project”- In the Welcome window press New project (or choose File > New project…).
- In Name type
first_room. Use letters, digits and_only, because the exported files are named after it. - Location is the folder the project folder goes into (Browse… changes it); the dialog shows the Project file it will make. Press Create. The editor opens on an empty grid in the Creator workspace, with a Start with a room hint in the middle.
tut1-01-new-project.webp2. Draw the room
Section titled “2. Draw the room”- Press R for the Room tool (or click it in the Tools column on the left of the view).
- Press on the grid and drag a rectangle. Watch the readout: aim for about 5.00 x 4.00 m. Release, and four walls and a room appear. The room gets a floor and a ceiling automatically.
- Want exact numbers? While dragging, type
5,4and press Enter (Tab types the comma). - Orbit with the right mouse button, pan with the middle mouse button and zoom with the wheel to look at it from different angles (these are the default Modlo controls; Preferences > Controls has a Blender scheme). Press Shift+F (or Home) to frame everything again if you get lost.
tut1-02-room-drag.webp3. Add a door
Section titled “3. Add a door”- Press I for the Door tool.
- Hover one of the long walls. A ghost door follows the pointer and snaps to the middle of the wall when you come near it.
- Click to place it. The standard door is 1.30 x 2.30 m, the size the game uses. The tool options strip over the view sets the Width, the Height and the door model of the next door; with no door model (the default) the door is an open doorway.
tut1-03-door-tool.webpThis door is in an outer wall, so it leads outside. The export turns it into an exit portal: the outside world shows through it from inside and the interior shows from outside. Every interior needs at least one opening to the outside (unless it is a teleport interior).
4. Add a window
Section titled “4. Add a window”- Press N for the Window tool.
- Hover another outer wall and click. The tool options choose the kind (Plain, Bank of panes, Louvre, Round) and, for a plain window, its Width, Height and Sill (1.20 x 1.20 m on a 0.90 m sill to start with).
5. Select and adjust
Section titled “5. Select and adjust”- Press V for the Select tool and click the window.
- Its Properties appear on the right. Open the Shape section and set Opening style to Arch (semicircle), or open Decorations (curtains and blinds) and press + Curtains.
- In the view, drag the square on the window’s side edge to make it wider, or the cyan arrow to slide it along the wall. Sizes go in 5 cm steps; hold Shift to size freely.
tut1-04-window-properties.webp6. Paint the floor
Section titled “6. Paint the floor”- Open the Assets tab in the bottom strip. A new project has a single Default material; press + Add and choose Import default materials to add the editor’s starter set (Concrete, Plaster, Wood planks, Brick, Tiles, wallpaper and more).
- Drag Wood planks onto the floor in the view. The floor is painted.
- Drag White plaster (tint it) onto a wall: dropping on a wall paints the span under the pointer.
tut1-05-assets-add.webpWant one of the game’s own textures instead? Open the Textures tab (it needs your GTA V install), search for floor and drag
a card onto the floor: it becomes a material of the project and paints the surface in one go.
The Paint tool (B) does the same with clicks and has shortcuts for whole rooms. You will use it in the next tutorials.
7. Add a light
Section titled “7. Add a light”- Press L for the Light tool. The tool options choose Point, Spot or Capsule.
- Click in the middle of the room. The light hangs 0.3 m under the ceiling, and snaps to the room’s middle, halves and thirds.
- Switch the view’s shading to Lit (the shading buttons at the right of the view header) to see only the placed lights. Select the light (V, then click it) to change its Colour and Intensity in Properties.
tut1-06-light-lit.webp8. Place a prop
Section titled “8. Place a prop”This step needs your GTA V install.
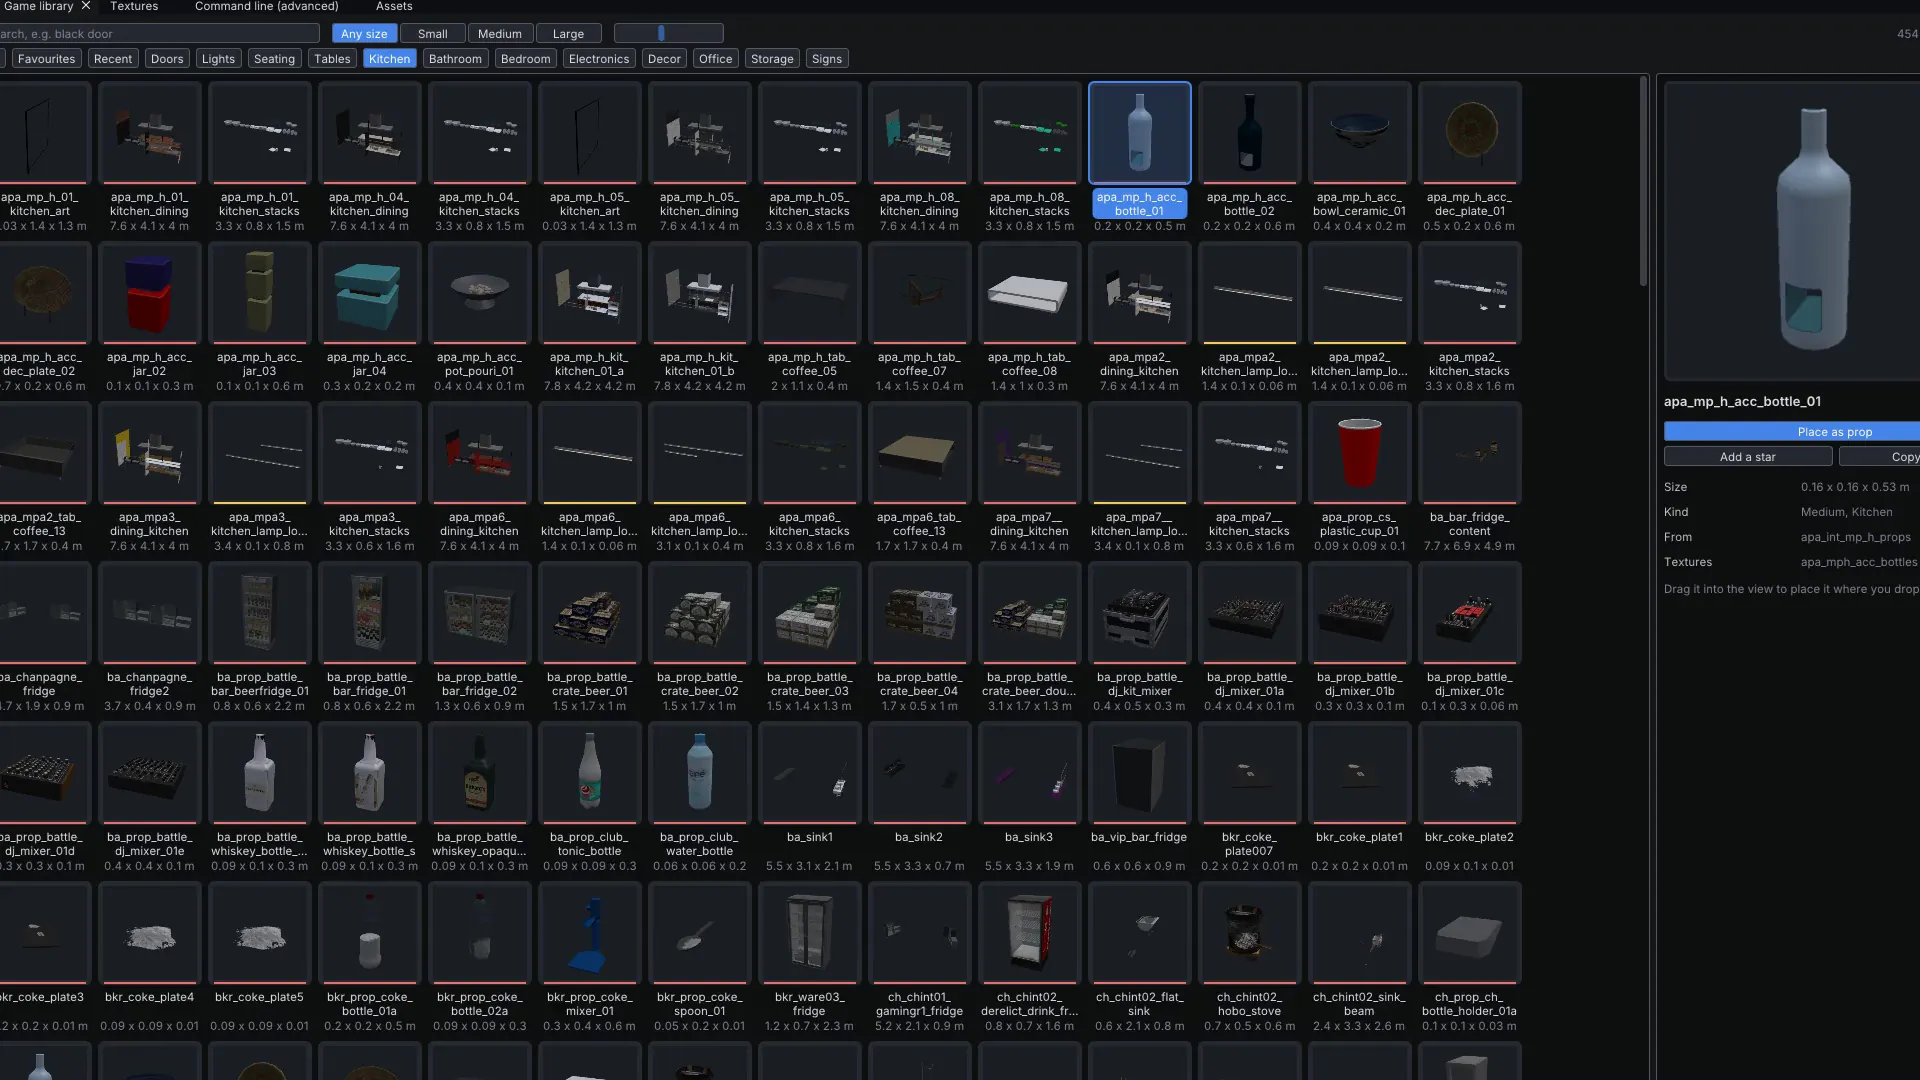
- Open the Game library tab in the bottom strip.
- Type
sofain the search box, or choose Seating in the category menu beside it (it reads All at first). Drag the strip’s edge up and the categories show as chips instead. - Drag a card into the view. A ghost follows the pointer; near a wall, it backs flat against it and turns to face the room.
- Release to place it. The new prop is selected: Shift+R turns it 90 degrees.
tut1-07-prop-ghost.webp9. Check Problems
Section titled “9. Check Problems”When something needs attention, the right of the status bar at the bottom shows a count of errors or warnings: click it to open the Problems list (also Window > Problems), and click a line to select the item it is about. Fix the errors (red): with them the interior will probably not work in game. Warnings (amber) are worth reading. For this room there should be no count at all. If the list says the room is sealed or that no door or window leads outside, check that your door is in an outer wall.
tut1-08-problems.webp10. Export
Section titled “10. Export”- Press Ctrl+E (or the blue Export button at the right of the menu bar, or File > Export…).
- Leave the format on Resource (FiveM), and Game on Legacy unless your server runs GTA V Enhanced (then choose Enhanced, or Both for a resource that works on either). Checks shows the same counts as the Problems list.
- Under Folder, a new project starts with
Export/first_roominside its own folder. If it says none chosen (a project you opened later), press Choose folder… and pick a folder named after the resource. The folder’s name is the resource name. - Press Export. The files are built in the background and the Export report lists what was written.
tut1-09-export-dialog.webpYou now have a complete resource folder with fxmanifest.lua, a stream/ folder of game files (stream_enhanced/ for
Enhanced) and the interior’s audio data in audio/.
Next steps
Section titled “Next steps”- Load it in game: 2. Testing on your FiveM server.
- Build something bigger: 3. A small apartment.
- Learn the full set of wall tools: Walls, rooms and levels.